Showing posts with label Flow. Show all posts

Nov 17, 2023

Write a Custom API call from Clout Flow

In a previous article, we check how we Write a Custom API and calling it from classic workflow. It worked well, yet we encountered some hiccups in deployment. Actually, recommended way is to call it from a Cloud Flow than a workflow.

Lets check that using a simple sample Cloud Flow. Implementation of the Custom API remains the same. Please refer that part from previous post. 

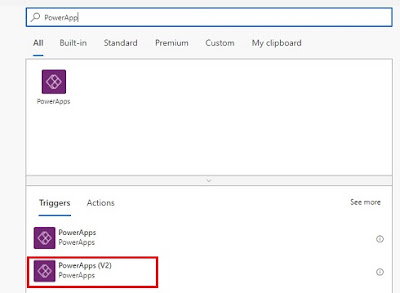
Lets do the calling part from a Cloud Flow. I would select a flow that triggered on demand from the custom entity (in our case so_office).

First I am selecting a task to trigger when selecting a record from Office where I need to select the environment along with entity.


Then I need to select Perform a bound action from list of actions of Microsoft Dataverse.


Now interestingly, we can see our Custom API within the Action lists shown, which we would select as below. Then we need to pass the row Id passed by trigger from the first action.


Now if you go open and office record, you are able to runt he Flow on Demand as any other workflow is triggered. 


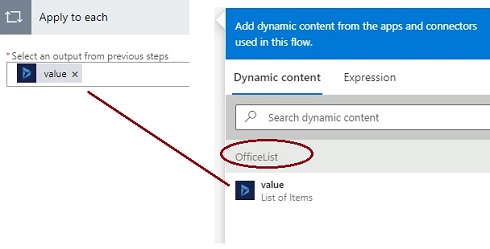
Here I demonstrated only simple on demand flow for ease of demonstration, but what we need to learn is, in any flow we can call out Custom API using Performa Bound Action of Microsoft Dataverse. Most importantly, this is the recommended way than calling from a workflow. 

Sep 21, 2023

Check current environment inside Flow

It can be useful to understand what environment flow is running on. This enables us perform separate action or use separate values based on the environment. Lets see how to do that.

Component we use here is Get Environment as Admin of Power Platform for Admins.


This lists down available environments along with option to give custom value which we select here. 


Then we need to select below formula.

workflow()['tags']['environmentName']


When we do any action, now we are allowed to select Display Name from same component and it will return the respective environment name.


We can use Compose component to check if you get the Environment name correctly.


Usually we use IF condition to perform separate action or use separate values by environment. In below example, IF condition is used to set company Email address only if the Environment is UAT otherwise use personal Email address.
 
if(equals(outputs('Get Environement as Admin')?['body/properties/displayName'],'UAT'),'info@abc.com','sumedha@abc.com')

Hope this helps.

Sep 20, 2022

Calling a Child Flow

When we worked with old school Workflows, we usually use child workflows to keep the logic in one central point if need to be trigger from different situations. I glad to see same approach is possible in modern flows/ Power Automate.

Below are the simple steps to follow;

1. Create the child flow first and make sure it is On.

2. Child Flow should be a Instant type one

3.So it will start with a manual trigger with what ever the parameter we need to pass value for.


4. Importantly, it is needed to end the child flow in style, by passing back the response to parent Flow. It can be just a simple success message.


5. Now we are good to call the child flow. When you do, it presented with Parameters, so easily values can be passed. 


This sounds simple.. but learning fundamentals is not a bad thing.

Feb 19, 2022

Qualify lead via a Power Automate/ Flow

 This can be done with 4 steps as illustrated below;

1. Retrieve Lead Id from Power App (In my case we trigger this from a Canvas App – you can trigger from many other forms)

2. Obtain the Access Token. (Application needs to have registered in Azure, where you get Application Id and Secrets required for this step)

3. Initialize a Variable with Access Token retrieved in previous step

4. Execute the Qualify Lead through API.

Let’s see details of each step;

1. Select Power Apps (V2) as the trigger. When opening the new Power Automate, I would skip the wizard so I get much flexibility in selecting my trigger through below window. Then I can add my only Parameter, which is Lead Id.


2. Below is the configuration details pass into Http Request in this step. Please notice some details are from App registration.

3. If you pass the correct details in previous step, it will produce the Access Token, which we read into a variable in this step.

4. Now it’s a matter of executing the Lead Qualify message through API. For this also, we use Http Request. Please notice how we pass the Token and Lead Id. I am only change the state as Lead Qualification, but configuration can be changed to create Contact/Account easily (Check Body). 

Now it’s a matter of calling the Power Automate/ Flow from Power App.

Reference;

https://www.inogic.com/blog/2019/05/qualify-lead-in-dynamics-365-through-the-canvas-app-with-microsoft-flow/

May 15, 2020

Power Automate - Loop through a list of records

Unarguably, It is necessary to learn how to use Power Automate/ Flow instead of Workflows. To be honest, I am sceptical on replacing all the complex workflows we have been developing for many years. In my mind, I try to figure out different approaches to address different requirements. This is the first post from a series I am planning to illustrate what I found. This shows how to loop through a list of records and perform the same action for each.

In my example, I have only three steps as shown below.


I am triggering for any update happen for Account record. This is simple.


Here I am reading a set of records from an entity called Office using a control called List Records (which I rename as OfficeList). One Account can have multiple Offices. Office entity have a lookup field called Main Account (su_mainaccount). Here you can notice how Account Id from triggering step being passed to map with Main Account, so related Office records would be returned.


Now I am using Apply to each control and most importantly I am passing List of records (type of Office) returned from  previous action.


Now, inside the Apply to each control I am creating a Task. In fact, we create task for each record in the list.


Here is one such task being created. Circled text shows the Name of the Office record, where I have passed as a variable in above control. So each office will get their respective names in it.


Hope this helps.

Sep 1, 2019

Is Workflow a thing of past ?

When you start working with Dynamics 365 CE Unified Interface, one of the things you would notice is there is no menu item to see available On Demand Workflows against a record.

This happens because this option is set to No by default. Below is the place (Settings > Administration > System Settings > Customization tab) to switch it Yes.


Once this is switched to Yes, new menu item will be visible called Flow (not Workflows!) as below, that contains relevant On Demand workflows. 


By the way, why this menu area called Flow? Well that's interesting. Flow is going to be the successor of good old Workflows! That's what Microsoft is recommending. As a evidence, when try to create a new workflow, you can now see it is pushing the user to move to Flow as below;


Is Workflow a thing of past ?

May 9, 2018

PowerApp to Add New Contacts to Accounts

Click here to check the steps of creation of the Flow, which is utilised in this exercise.

PowerApps are meant to be catered for one simple operation, especially when it should be separated and easy to be handled by a user. Other advantage is PowerApp user doesn’t need to know how to use Dynamics 365. For example, this app enables a sales person to add a Contact for a given Account very quickly, may be while in the field.

Login to PowerApps in https://powerapps.microsoft.com and start new PowerApp with Dynamics 365 Phone Layout.


Select Data Table as Accounts to have a basic App that allows your to Read and Edit Accounts. This is auto-generated.


Let’s start steps to enhance this basic app to address our need;

1) Add a New Screen Called AddContactScreen.


2) Add the Home icon to browse back to Main screen.


3) Now add Person sign to Home Screen that enables browsing to our new Screen. Now our browsing in between screens are functional.


4) Add a new Form to our new screen (i.e. AddContactScreen)  with two Data cards for Account Name and Id.


Make sure selected Item is set as below for the Form. This helps us see which Account we selected and Id is available within new Form to proceed with next steps.


Also, make Id invisible.

5) Now add 2 labels and 2 Input Texts for First Name and Last Name followed by a Button (i.e. Create Contact in D365)for submission. Now our components should be looked like below;


6) Select Button, go to Action Tab, Select Flow, which enables selecting any Flows we have. (Creating the relevant Flow for this exercise in detailed here)


Now pass the parameters to Flow as below and navigate back to the Home.


7) Let’s check how this work.


Here we got the new Contact created in Dynamics 365.


Very good example on Canvas App : https://docs.microsoft.com/en-us/powerapps/maker/canvas-apps/data-platform-create-app-scratch

A simple Flow to create a Contact for existing Account

This Flow itself doesn’t seems to make any sense, but my plan is to call this through a PowerApp. Click here for PowerApp steps. Below steps illustrate some generic approach for a simple Flow operation.

1) Browse to https://flow.microsoft.com and sign-in. Though, there are many templates, I would like to start a Blank Flow for our simple operation.


2) Since we are planning to call this Flow from a PowerApp, select PowerApp as the starting trigger.


3) Now we need to Define three String Variables for First Name, Last Name and Company Name.

a. First Select Variable type from Action list.


b. Now select Initialize Variable action.


c. When initializing the Variable, for Value select Select In PowerApps comes under Add Dynamic Content.


d. Make sure we create String type variable for Account Id as well. (Remember, we plan to call this Flow from a PowerApp which will pass a Guid)


4) Create Contact Record

a. Select Create record in Dynamics 365 action.


b. Now select you D365 instance and entity which is Contact.

c. Now Assign the variable values as appropriate. You will notice we have mapped value for extra field, Company Name Type as Accounts. This is because this Lookup can have both Account and Contact values. This type declaration is important when creating Activities with regarding Id where type can be varied.


5) Now check the final product, execute and see.

This is how our Flow should look like at last.