Nov 21, 2012

Recursive workflows instead of windows services?

Please refer this for better solution.

In Dynamics CRM, we don’t have a facility to schedule an activity. Typically, one might need to change the status of a record without any interaction/ trigger. For example expiration of insurance policy. For this what we usually do is writing a windows service.

http://crmbusiness.wordpress.com/2011/05/24/crm-2011-how-to-schedule-recurring-workflows-in-crm-2011/

This blog article encourages us to use a recursive workflow instead of a windows service. It is a clever way of writing a workflow in a recursive pattern with delays to accomplish the objective. It seems fantastic since it can be achieved without any trouble or coding. I did a test workflow as this author explains (with a waiting time of 1 hour) and it worked well for me. 

Anyway, it is yet to be taken to the discussion table to check positive and negative consequences.

Also I think, it is better to do the state change like simple operation through the workflow and triggers a plug-in for rest of the complex operations if the requirement consists of lengthy logics.
Furthermore, we can even identify this call by filtering by asynchronous call filter as below.

if (context.CallerOrigin.GetType() == 
            typeof(Microsoft.Crm.Sdk.AsyncServiceOrigin))
        {
            //plug-in steps
        }

Nov 11, 2012

Importing CRM instance from different domain

Importing a CRM instance can be quite tricky. Typically, we might need to get an identical instance from production server to a new developing server or wise versa.

I am explaining the steps with illustrations. This worked for me. As I see, we have three main tasks to be done. They are getting the backup from the existing database; restore it in new server and configuring the CRM using Deployment manager.

1) Getting the backup from the existing database

There is nothing new about this step rather than getting the full back up of the organization which is in the format of <NAME>_ MSCRM. Right click the db >tasks>Back up take you to the wizard. Under option I usually select below options;
 a) Override all existing backup sets
 b) Verify backup when finished
 c) Perform checksum before writing to media

2) Restore the database in new (destination) server
Right click any database> task>restore>database takes you to the wizard. Then change the database name as required in the format of <NAME>_ MSCRM, where NAME will be the name of new CRM instance. Then go to “From device” and browse to the database backup taken in the previous task.


3) Import/configure  the CRM instance

a. Go to Organizations node, right click the  select “Import Organization”, which will return below window with newly created database.


b. Give the name in both places


c. Specify the URL of reporting server for the instance and proceed.


d. When it comes to the user mapping window, select “Automatially map users” option and proceed.


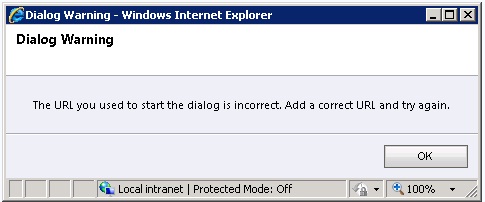
e. Then you will probably get below error message.


Press Ok, you will get below window.


f. Now find the “System Administrator” from existing user column and assign it to yourself by licking the browse button.


If you forget to do this you will be thrown another error message like below one.


g. If you have done everything correctly, you will now see below window.


h. When you proceed, you will see below kind of summery.


i. Now you are ready with new instance.


Now you are ready to work with new instance.

However, keep in mind; you may need to take below steps depending on the customizations done in your system.

1) If you have any kind of configuration files, you need to copy and change as required.
2) If you have done Plug-ins you must copy those DLL files to Program Files\Microsoft Dynamics CRM\Server\bin\assembly
(Open the plug-in registration tool and notice your plug-ins are already registered correctly)
3) Add other users of domain your new CRM is placed.

Nov 1, 2012

Sample Plug-in: Delete

It is important to do something, when a record is being deleted. For that we need to use a plug-in that catches the pre-delete action.

Difference of this approach is we retrieve entity reference instead of entity. Then we can retrieve the other attributes through retrieve method since we got the Id. (While we are in Pre stage we still have time to grab them.)

Check the code as below;

using System;
using System.Collections.Generic;
using Microsoft.Xrm.Sdk;
using Microsoft.Xrm.Sdk.Query;
using System.ServiceModel;

namespace TestCompany.CRM.Plugin
{
 public class officePreDelete : IPlugin
 {
   public void Execute(IServiceProvider serviceProvider)
   {
     IPluginExecutionContext context;
     IOrganizationServiceFactory factory;
     IOrganizationService service;

     try
     {
       context = (IPluginExecutionContext)serviceProvider.GetService(typeof(IPluginExecutionContext));
       if (context.InputParameters.Contains("Target") && context.InputParameters["Target"] is EntityReference)
       {
         EntityReference EntityRef = (EntityReference)context.InputParameters["Target"];
         if (EntityRef.LogicalName != "new_office")
             return;
                     
         factory = (IOrganizationServiceFactory)serviceProvider.GetService(typeof(IOrganizationServiceFactory));
         service = factory.CreateOrganizationService(context.UserId);
                   
         // Do the logic as required
         // use EntityRef.Id retrive other attributes

        }
      }
      catch (FaultException<OrganizationServiceFault> e)
      {
        throw e;
      }
      finally
      {
        service = null;
        factory = null;
        context = null;
      }
   }
 }
}

Now check the plug-in registration setting;


Important Note
Pl note, though we are in pre-Delete stage, record has already lost the relationships with other records. This means you are not able to query other records using the values in deleting record. If you need to do, what needs to do is register the plug-in step in Pre-validation stage than Pre-operation.

Related posts;
Sample Plug-in: Compare Pre and Post images on Update
Sample Plug-in code: Create and Update
Retrieve attributes of entity object


Oct 31, 2012

Sample Plug-in: State change

It is important to catch the action when a state change occurs for a record. What we are referring here is the setting of Status (statecode) and Status Reason (statuscode). They are native CRM fields and they work as combinations. These values even determine whether a record is active or inactive. Here you can see full list of those codes for native CRM entities.

Though, those fields appear normal, one should not attempt to update them using normal update method as any other field. They are special fields and they are changed through state change method only.

What is important is, we have separate messages to capture those state changes and we have to write the plug-in code accordingly. Please refer below code to understand how we grab those codes so that we are ready to implement the logic.

Please note state.Value and status.Value we get in this code is the new values after the set state operation. We may capture whatever the status change we are interested in.

using System;
using System.Collections.Generic;
using Microsoft.Xrm.Sdk;
using Microsoft.Xrm.Sdk.Query;
using System.ServiceModel;

namespace TestCompany.CRM.Plugin
{
 public class officeSetState : IPlugin
 {
   public void Execute(IServiceProvider serviceProvider)
   {
     IPluginExecutionContext context;
     IOrganizationServiceFactory factory;
     IOrganizationService service;

     try
     {
       context = (IPluginExecutionContext)serviceProvider.GetService(typeof(IPluginExecutionContext));
       factory = (IOrganizationServiceFactory)serviceProvider.GetService(typeof(IOrganizationServiceFactory));
       service = factory.CreateOrganizationService(context.UserId);

       if ((context.InputParameters.Contains("EntityMoniker")) && (context.InputParameters["EntityMoniker"] is EntityReference))
       {
        var targetEntity = (EntityReference)context.InputParameters["EntityMoniker"];
        var state = (OptionSetValue)context.InputParameters["State"];
        var status = (OptionSetValue)context.InputParameters["Status"];

        if (targetEntity.LogicalName != "new_office")
        { return; }
                    
         // Set State Logic
         // state.Value gives state code
         // status.Value gives status code

        }
      }
      catch (FaultException<OrganizationServiceFault> e)
      {
        throw e;
      }
      finally
      {
        service = null;
        factory = null;
        context = null;
      }
    }
  }
}

Tricky part lies here. When registering the plug-in we need to have steps for both SetState and SetStateDyanamicEntity messages.


Related posts;
Sample Plug-in: Delete
Sample Plug-in: Compare Pre and Post images on Update
Sample Plug-in code: Create and Update
Retrieve attributes of entity object

Sample Plug-in: Compare Pre and Post images on Update

We often use Update message to execute something after identifying whether a particular value is changed from A to B. Typically, we might need to handle some logic to be run upon state change which is defined as a custom field (actually an optionsetvalue). In this case, we need to implement a post update plug-in with two images. Here images are snapshots of the entity in pre/ post execution which enables us to compare some values.

Scenario I am explaining got a custom field called new_officestatus which holds the status of office (new_office entity). It says whether a given office is a main, regional or sub office.


Suppose we need to do something when an office is converted from Sub to Regional.  What we going to do is compare the values of the status in each update action. Below are the optionsetvalues;

Regional - 100000001
Sub – 100000002
Main – 100000003

If we find Pre image with 100000002 and Post image with 100000001, it is the exact time that a sub office is converted to a regional one, which we need to execute our custom logic. Below code shows how it’s being done programmatically.

using System;
using System.Collections.Generic;
using Microsoft.Xrm.Sdk;
using Microsoft.Xrm.Sdk.Query;
using System.ServiceModel;

namespace TestCompany.CRM.Plugin
{
public class officeUpdate : IPlugin
 {
  public void Execute(IServiceProvider serviceProvider)
  {
   IPluginExecutionContext context;
   IOrganizationServiceFactory factory;
   IOrganizationService service;
   Entity PreImage;
   Entity PostImage;

   try
   {
     context = (IPluginExecutionContext)serviceProvider.GetService(typeof(IPluginExecutionContext));
     factory = (IOrganizationServiceFactory)serviceProvider.GetService(typeof(IOrganizationServiceFactory));
     service = factory.CreateOrganizationService(context.UserId);

     PreImage = (Entity)context.PreEntityImages["PreUpdateImage"];
     PostImage = (Entity)context.PostEntityImages["PostUpdateImage"];

     int _preOfficestatusVal = 0;
     int _postOfficestatusVal = 0;

     if (PreImage.Contains("new_officestatus"))
     { _preOfficestatusVal = ((OptionSetValue)PreImage["new_officestatus"]).Value; }
     if (PostImage.Contains("new_officestatus"))
     { _postOfficestatusVal = ((OptionSetValue)PostImage["new_officestatus"]).Value; }

     if ((_preOfficestatusVal == 100000002) && (_postOfficestatusVal == 100000001))
     {
        // Logic for - Sub converted to Regional
     }

    }
    catch (FaultException<OrganizationServiceFault> e)
    {
      throw e;
    }
    finally
    {
      service = null;
      factory = null;
      context = null;
      PreImage = null;
      PostImage = null;
    }
  }
 }
}

Now we will see plug-in registration. Here, we register two images for Pre and Post stages. They have the same name as images we read from the context in the code.


Related posts;
Sample Plug-in: Delete
Sample Plug-in: State change
Sample Plug-in code: Create and Update
Retrieve attributes of entity object

Oct 30, 2012

Sample Plug-in code: Create and Update

This is a sample code which can be used for create and update of a record. Here I have used a custom entity called new_office.

using System;
using System.Collections.Generic;
using Microsoft.Xrm.Sdk;
using Microsoft.Xrm.Sdk.Query;
using System.ServiceModel;

namespace TestCompany.CRM.Plugin
{
public class officePreCreate : IPlugin
{
  public void Execute(IServiceProvider serviceProvider)
  {
    IPluginExecutionContext context;
    IOrganizationServiceFactory factory;
    IOrganizationService service;
    Entity TargetEnt;

    try
    {
     context = (IPluginExecutionContext)serviceProvider.GetService(typeof(IPluginExecutionContext));
     if (context.InputParameters.Contains("Target") && context.InputParameters["Target"] is Entity)
     {
       TargetEnt = (Entity)context.InputParameters["Target"];
       if (TargetEnt.LogicalName != "new_office")
           return;

       factory = (IOrganizationServiceFactory)serviceProvider.GetService(typeof(IOrganizationServiceFactory));
       service = factory.CreateOrganizationService(context.UserId);

       // Do the logic as required

      }
     }
     catch (FaultException<OrganizationServiceFault> e)
     {
       throw e;
     }
     finally
     {
       service = null;
       factory = null;
       context = null;
       TargetEnt = null;
     }
  }
}
}

Create message

In both Pre and Post stages we have all the attributes of the record to be used in our logic. We got to select either pre or post stages depending on business logic.

In pre stage (both Create and Update) we have an extra facility of changing attributes before Creating / Updating the record. For example, if I need to add some postfix to a string fields, I can do as below;

if (TargetEnt.Contains("new_name"))
{
    TargetEnt["new_name"] = TargetEnt.Attributes["new_name"] + " Pvt Ltd";
}

Consider the settings of the plug-in registration;

Pre Create;


Post Create;


Only difference would be the stage of execution.

Update message

When updating, in both Pre and Post stages, we get only modified attributes and primarkey. In Pre stage it is possible to amend those available values before updating. For example we can do the adding of postfix explained above if that field is available (i.e. modified) in target entity.

Consider the settings of the plug-in registration;

Pre Update;


Post Update;


Now message is Update instead of Create and stages are varied as Pre and Post.

Related posts;
Plug-in concerns: synchronous or asynchronous, transactional or not …
Sample Plug-in: Delete
Sample Plug-in: State change
Sample Plug-in: Compare Pre and Post images on Update
Retrieve attributes of entity object

Retrieve attributes of entity object

This is basic, but someone who is starting to code plug-ins (and custom codes) in CRM 2011 would be helped.

First visit this, which explains few basic differences of plug-in syntaxes in CRM 2011 with compared to earlier version.

Below are types we can initiate in our codes with their initial values.

Guid myGuid = Guid.Empty; // 00000000-0000-0000-0000-000000000000
String myString = String.Empty; // NULL
EntityReference myEntityReferance = new EntityReference(); //NULL
OptionSetValue myOptionSetValue = new OptionSetValue(); // 0
DateTime myDateTime = new DateTime(); //1/01/0001 12:00:00 AM
Decimal myDecimal = Decimal.Zero; // 0
Money myMoney = new Money(); // 0

Below are some simple ways of reading them from an entity object.

if (TargetEnt.Contains("new_officeid"))
{
myGuid = (Guid)TargetEnt.Attributes["new_officeid"];
}
if (TargetEnt.Contains("new_name"))
{
myString = TargetEnt.Attributes["new_name"].ToString();
}
if (TargetEnt.Contains("new_officestatus"))
{
myOptionSetValue = (OptionSetValue)TargetEnt["new_officestatus"];
}
if (TargetEnt.Contains("createdby"))
{
myEntityReferance = (EntityReference)TargetEnt["createdby"];
}
if (TargetEnt.Contains("createdon"))
{
myDateTime = (DateTime)TargetEnt["createdon"];
}
if (TargetEnt.Contains("new_revenue"))
{
myDecimal = (Decimal)TargetEnt["new_revenue"];
}
if (TargetEnt.Contains("new_cost"))
{
myMoney = (Money)TargetEnt["new_cost"];
}

Oct 21, 2012

Rule definitions to enable buttons for All RECORDS or SELECTED REDCORDS

This is a handy way of enabling the buttons either for “all records” or “selected once”. I will explain a scenario as below;

Consider an action you need to do against the records populated in a grid/subgrid. Typically we may need to do the action in two ways;

1) We may need to select records and perform the action
2) We may need to perform action for all the records

My solution is to introduce two custom buttons with two rule definitions that work well in terms of useability engineering aspects.

When loading the grid you will see only “All records” button enabled as below. (Pic. A). Idea is, if user interested in executing the action against all record, nothing to worry, just press it.


Suppose, we need to cherry pick the records. Now as soon as we start to select records, we get the view of this. (Pic. B).


Now only “Selected records” button is enabled. There is no confusion; one can execute the action only for selected items. If user deselects everything again, ribbon buttons will get changed to previous state again. (Pic. A)

Now we will see the simple way of defining the enabling rules for both buttons.

<RuleDefinitions>
  <TabDisplayRules />
  <DisplayRules />
  <EnableRules>
    <EnableRule Id="Mscrm.Cu_Selected">
      <SelectionCountRule 
        AppliesTo="SelectedEntity" Maximum="25" Minimum="1">
      </SelectionCountRule>
    </EnableRule>
    <EnableRule Id="Mscrm.Cu_SelectedAll">
      <SelectionCountRule 
        AppliesTo="SelectedEntity" Maximum="0" Minimum="0">
      </SelectionCountRule>
    </EnableRule>
  </EnableRules>
</RuleDefinitions>

Value 25 can be changed as you wish, which marks the maximum number you can select keeping the select button enabled.

Related articles;
How to proceed with All RECORDS (i.e. Scenario A) for Advanced Find results : Click here
How to proceed with SELECTED RECORDS (i.e. Scenario B) : Click here

Oct 14, 2012

Custom Group in Entity Ribbon

It is useful to know how to implement a new group in the ribbon and also to put buttons inside it. Before starting to explain an example I am happy to remind you a basic rule again.

Ribbon modifications can be done in main three ways to distinguish how they should appear in to user. They can be explained as below;

Mscrm.Form.<entityname>change appears when form is opened for selected record.
Mscrm.HomepageGrid.<entityname>change appears when grid is shown (multiple records)
Mscrm.SubGrid.<entityname> - change appears when records appear within a subgid of some other entity OR appears in the result pane of the advanced find

OK, I am here going to do the sample for Subgrid (so my tag naming format will be like Mscrm.SubGrid.<entityname>). In my example I am going to consider a custom entity called new_insurance.

My scenario is to give few buttons to renew insurance. Here I am just implementing one button to create a quote, but I put it in a Group called “Renewal Methods” so I can have other optional buttons for the same need.

This is the main custom action tag. Noticeably, it contains a button tag as we already know. So we can have many as required.

<CustomAction Id="Mscrm.SubGrid.new_insurance.RenewalGroup.CustomAction" 
              Location="Mscrm.SubGrid.new_insurance.MainTab.Groups._children" 
              Sequence="110">
  <CommandUIDefinition>
    <Group Id="Mscrm.SubGrid.new_insurance.RenewalGroup.Group" 
           Command="Mscrm.SubGrid.new_insurance.RenewalGroup.Command" 
           Title="Subscription Renewal" 
           Sequence="51" 
           Template="Mscrm.Templates.Flexible2">
      <Controls Id="Mscrm.SubGrid.new_insurance.RenewalGroup.Controls">
        <Button Id="B_CUSTOM_QuoteCreate" 
                Command="Cmd_CUSTOM_QuoteCreate" 
                LabelText="Create Quote" 
                ToolTipTitle="Create Quotes" 
                ToolTipDescription="Create quotes for renewal subscriptions" 
                TemplateAlias="o1" 
                Image16by16="/_imgs/SFA/ReviseQuote_16.png" 
                Image32by32="/_imgs/SFA/ReviseQuote_32.png" />
      </Controls>
    </Group>
  </CommandUIDefinition>
</CustomAction>

Now we need to add two more custom action tags to define the appearance of the group we are introducing here.

<CustomAction Id="Mscrm.SubGrid.new_insurance.RenewalGroup.MaxSize.CustomAction" 
              Location="Mscrm.SubGrid.new_insurance.MainTab.Scaling._children" 
              Sequence="120">
  <CommandUIDefinition>
    <MaxSize  Id="Mscrm.SubGrid.new_insurance.RenewalGroup.MaxSize" 
              GroupId="Mscrm.SubGrid.new_insurance.RenewalGroup.Group" 
              Sequence="21" 
              Size="LargeLarge" />
  </CommandUIDefinition>
</CustomAction>

<CustomAction Id="Mscrm.SubGrid.new_insurance.RenewalGroup.Popup.CustomAction" 
              Location="Mscrm.SubGrid.new_insurance.MainTab.Scaling._children" 
              Sequence="140">
  <CommandUIDefinition>
    <Scale Id="Mscrm.SubGrid.new_insurance.RenewalGroup.Popup.1" 
           GroupId="Mscrm.SubGrid.new_insurance.RenewalGroup.Group" 
           Sequence="85" 
           Size="Popup" />
  </CommandUIDefinition>
</CustomAction>

Now this is nothing new, we just define a JavaScript method to pass the selected ids when button is clicked.

<CommandDefinition Id="Cmd_CUSTOM_QuoteCreate">
  <EnableRules>
    <EnableRule Id="Mscrm.Cu_Selected" />
  </EnableRules>
  <DisplayRules />
  <Actions>
    <JavaScriptFunction Library="$webresource:new_createquote.js" FunctionName="CreateQuote">
      <CrmParameter Value="SelectedControlSelectedItemIds"></CrmParameter>
    </JavaScriptFunction>
  </Actions>
</CommandDefinition>

Then we define a command definition, actually without any rule since group is to be just viewed.

<CommandDefinition Id="Mscrm.SubGrid.new_insurance.RenewalGroup.Command">
  <EnableRules  />
  <DisplayRules />
  <Actions />
</CommandDefinition>

Then we define a command definition, actually without any rule since group is to be just viewed.
Finally we have an enable rule for the button which is quote smart. In fact, button get enabled only when at least one records selected and not more than 20 records selected. We change this as required.

<EnableRule Id="Mscrm.Cu_Selected">
  <SelectionCountRule 
    AppliesTo="SelectedEntity" Maximum="20" Minimum="1">
  </SelectionCountRule>
</EnableRule>

Once implement, we will see the subgrid Ribbon this;

Oct 4, 2012

Advanced find – Select all the records of all the pages

Ribbon of advanced find result view

 
Ribbon of the result pane of advanced find view is same as Subgrid ribbon. Yep it is! So whatever the ribbon modifications you do with the format of  “Mscrm.SubGrid.<entityname>” is being applied for this ribbon. So you are free to do anything with any custom button by executing a Javascript as I explained in my previous post. Check it here.

Now we know, we can pass different parameters to our method, but obviously, favourite would be the passing of Ids of selected records. So we are good to do any operation for those records.

Reading the current grid VS reading the full result set

Anyway, none of these parameters leads us to read all the records of all the pages of the result. Our operations are restricted to current grid. Current grid could hold maximum records of 250, with least 25, depending on your settings.


If our result consists of more records and we need to do a batch operation for all of them we are not helped. One approach would be to save the view after selecting the criteria and again read the relevant fetch from SavedQueryBase. Problem of this approach is one has to save it manually with a predetermined name. (Name is to be used when querying by the programme)

Now this is a way of reading the relevant Fetch XML without saving, from the result pane. I urge this is an unsupported method, but it works.

var _XML = document.getElementById("fetchXml");
alert(_XML.value);

Now we have the fetch used to read the data for advanced find, so we are ready to do any operation for entire result set.

Sep 27, 2012

Read Selected Guids from Subgrid

Through the article I posted about a custom recalculation button, I explained the way of introducing a custom buttons to the ribbon. Check it here.

When it comes to the subrid, most important requirement is to read the selected Ids. We will see how we pass those in to a Java script through the custom button.

This is the simple way we need to pass selected Ids as a parameter for the calling method. (Read the previous article if you need entire entry for custom button)

....
<Actions>
<JavaScriptFunction 
  Library="$webresource:new_createquote.js" 
  FunctionName="CreateQuote">
<CrmParameter Value="SelectedControlSelectedItemIds"></CrmParameter>
</JavaScriptFunction>
</Actions>
....

Will see how those Ids are grasped from the method.

function CreateQuote(value)
{
    alert(value);
}

Below is the result which shows the selected ids as an array.


Quite simple, yet important.

Note:
There are few more parameter types we can pass to JavaScript methods from ribbon as required. Please check them below;
  • SelectedEntityTypeCode : A number representing the unique type of entity for a record selected in a grid. The Entity type code will vary between deployments.
  • SelectedEntityTypeName : A string representing the unique name of the entity for a record selected in a grid.
  • FirstSelectedItemId : Provides one GUID identifier as a string for the first item selected in a grid.
  • SelectedControlSelectedItemCount : The number of selected items in a grid.
  • SelectedControlSelectedItemIds : A string array of GUID Id values for all selected items in a grid.
  • SelectedControlAllItemCount : A string array of GUID Id values for all selected items in a grid.
  • SelectedControlAllItemIds : A string array providing the GUID Id values for all items displayed in a grid.
  • SelectedControlUnselectedItemCount : The number of unselected items in a grid.
  • SelectedControlUnselectedItemIds : A string array of GUID Id values for all unselected items in a grid.
Read more information about CRM CrmParameter type here.

Sep 26, 2012

Execute a Dialog in form events

Dialogs are initially introduced to use through a given button and select one from the list in the resulted pop-up page. I think it could be used to get executed in different form events. Typically, when change a drop down, system can prompt a Dialog to get some responses related to that action which will do some other operation.

We can execute Dialog from any action. Check the method I use for this;

function launchDialog(_dID, _eName, _rId)
{

var sUri = Mscrm.CrmUri.create('/cs/dialog/rundialog.aspx');

window.open(sUri + '?DialogId=' + _dID + '&EntityName=' + _eName + '&ObjectId=' + _rId, null, 'width=615,height=480,resizable=1,status=1,scrollbars=1');

}

We need to pass three parameters here. Check the calling part as below;

    var _workflowid = 'f2057c43-0670-4384-93d4-ac6147611c98';
    var _onjecttype = 'new_insurance';
    var _instanceid = crmForm.ObjectId;

    launchModelDialog(_workflowid, _onjecttype, _instanceid);

Though other two parameters are familiar, not workflow id. Ok now this is the way of obtaining it;
- Import the customization of the Dialog
- Open the customization file
- Search for word “Workflow”

You will see this kind of section which gives you the workflow id.

<Workflows>
<Workflow WorkflowId="{f2057c43-0670-4384-93d4-ac6147611c98}" Name="Insurance Renewal">
....
</Workflow>
</Workflows>

Caution

1) Be careful when deploying the since Guid of the workflow is different in different environments. So you have to change it accordingly.

2) One could feel like using a Dialog for an operation which has nothing to do with individual record (record instance). In such occasions, though it is logical to think not to pass any value for instance id, it is a must to pass one. If you don’t pass, Dialog will not pop-up as expected, but below message will be thrown.


Conceptually, Dialog is always defined against an individual record.

Sep 24, 2012

Using CRM Webservice from custom web page (CRM 2011)

One of the previous posts we illustrated the way of using CRM service in custom page for CRM 4.0. Check it here.

Now we will see how the same task is accomplished in CRM 2011

If we put it in a method;

public static IOrganizationService getService()
{
ClientCredentials _cred = new ClientCredentials();

_cred.Windows.ClientCredential = new NetworkCredential("CRM_ADMIN_01", "F1xit@OR5", "CRMBIZDOMAIN");
string _url = "http://crmbiz:5555/abcltd/XRMServices/2011/Organization.svc";

OrganizationServiceProxy serviceProxy = new OrganizationServiceProxy(new Uri(_url), null, _cred, null);

return (IOrganizationService)serviceProxy;
}

Now the calling part;

Aug 21, 2012

Using CRM Webservice from custom web page (CRM 4.0)

Suppose we need to do any operation in CRM through a custom webpage. Now we need to use CRM web service in the most standard way. Below is the way we can instantiate and authenticate the service which could be used in our page.

If we put it in a method;

public static CrmService getCrmWebService(string _serverName, string _orgName)
        {

         CrmAuthenticationToken token = new CrmAuthenticationToken();
         token.AuthenticationType = 0;
         token.OrganizationName = _orgName;

         CrmService _service = new CrmService();
         _service.Url = "http://" + _serverName + "/mscrmservices/2007/crmservice.asmx";
         _service.CrmAuthenticationTokenValue = token;

         NetworkCredential _cred = new NetworkCredential();
         _cred.Domain = "CRMBIZDOMAIN";
         _cred.UserName = "CRM_ADMIN_01";
         _cred.Password = "F1xit@OR5";
         _service.Credentials = _cred;

         return _service;
        }

Calling part;

CrmService _CrmService = CrmCore.getCrmWebService("corp-biz01:5555", "AxCRM01");

Now any operation is possible.

 
To check how to do the same thing in CRM 2011, click here.

Jul 16, 2012

Disable ribbon button through onload JavaScript

CRM 2011 is giving full control of custom button through ribbon concept over ISV configuration concept of CRM 4.0. Here I have mention how to enable/disable button according to rules we define.

Here, rule is a straightforward one. For example, if we need to disable a button depending on logged in user’s team, I am still unable to address through a rule definition. Till I find it I found a way of doing it through onload JavaScript.

Ribbon item behaves according to a defined style. What I do is manipulating the style according to my need. Here I need to disable a particular button if the user is not in “Admin” team.
First I grab the id of the button. I assume you know how to do that by F12 function as shown below.


Now replace the standard style of that button by standard style of the disabled button as required.

if (!userIsInTeam("Admin"))
{
 if (window.top.document.getElementById('<ID>'))
 {
 var _id = window.top.document.getElementById('<ID>');
 var str = _id.outerHTML;
 var str1 = str.replace("ms-cui-ctl-large", "ms-cui-ctl-large ms-cui-disabled");
 _id.outerHTML = unescape(str1);
 }
}

I urge this is not the best way, but this works.
If I manage to find a way to define a rule in XML, I am publishing it. If you find first, please share it for me too.

Script error of Follow up button

When clicking the Follow up button, sometimes users see a script error as by the bottom left of corner of the browser.


This occurs since your form assistant is disabled. Obviously, this is a contradiction.  Follow up pane should get loaded in form assistant section, which is not available.

Form Assistant and Follow up
So, when you design the form, you have to think Follow up functionality together with form assistant.

1) Option 1: If you want follow up, your form assistant should be enabled
For this, go to customizations > Open relevant entity > click Forms and Views > Open Form > Open Form prosperities > Click display tab.
Then enable the Form assistant by clicking the check box.


2) Option 2: If you want form assistant to be disabled, follow up button should be removed
How to remove the button using JavaScript is discussed here.

Decide this in terms of your useability expectations.

Jul 12, 2012

Reset Time of CrmDateTime

Surprisingly, I couldn’t find straightforward post of how to reset the time portion of the CrmDateTime. So I implemented my own method which worked for me. In fact, this might not the best code, but decent enough to use.

In my previous post I gave a hint that “Value” attribute is the key to CrmDateTime modifications/conversions. See, how I have used same attribute to modify the Time portion only.

public static CrmDateTime SetTime(CrmDateTime _dateTime,string _time)
{
  // considering datetime format as 2012-07-05T11:00:00+1000
  string _crmDTvalue = Convert.ToString(_dateTime.Value);
  string _crmDTvalueP1 = _crmDTvalue.Substring(0, 11);
  string _crmDTvalueP2 = _crmDTvalue.Substring(16);
  string _crmDTvalueNewTime = string.Concat(_crmDTvalueP1, _time, _crmDTvalueP2);

  CrmDateTime _crmDataTime = new CrmDateTime();
  _crmDataTime.Value = _crmDTvalueNewTime;

  return _crmDataTime;
}

Calling part;

//8 am
SetTime(_myCrmDateTime,"08:00");
//5 pm
SetTime(_myCrmDateTime,"17:00");

Please keep in mind, this method is subjective to the date time format you use, but this approach is easily used for any format.

CrmDateTime to/from DateTime

This is a simple kind of conversion, but for some reason, I had to play around to figure it out. So I am writing it here.

When converting to/from CrmDateTime in C# key is the “Value” attribute. We can simply read it and also assign it.

CrmDateTime to DateTime

DateTime _datetime = Convert.ToDateTime(dateTime.Value)

DateTime to CrmDateTime

 CrmDateTime _crmDataTime = new CrmDateTime();
 _crmDataTime.Value = _datetime.ToString("s");

Also, we can modify date time related other attributes this way.

Jul 2, 2012

Calling WCF service within a plug-in

Calling a third party service through plug-in could be an important aspect of a CRM development. I of course had a difficult time to figure out this. At the end of the day below sequence worked for me.

1)  Adding the service to Plug-in code
This step was as same as calling a service from general web application. Add the service URL and you will see it added to the Service Reference section.


Nor difference in calling part also. Something like below...

_service = new Rate();
_service.ChannelFactory.Credentials.Windows.AllowedImpersonationLevel = System.Security.Principal.TokenImpersonationLevel.Delegation;
 
_service.ChannelFactory.Credentials.Windows.ClientCredential.Domain = "<Domain>";
_service.ChannelFactory.Credentials.Windows.ClientCredential.UserName = "<User Name>";
_service.ChannelFactory.Credentials.Windows.ClientCredential.Password = "<Password>";

selltingRate = _service.ReturnSelltingRate(_prodId);

2) Defining the end points

Here is the tricky part. Now you got to define the endpoint of the service in the config of the CRM. You will find web.config of the CRM in C:\Program Files\Microsoft Dynamics CRM\CRMWeb. (Please make sure you get back up before modifying this file, since if it’s modified wrong, CRM will not load at all!)

Now go back to the Visual Studio project and open the app.config file of the same plug-in project. Now grab the endpoint of your service and relevant binding tag. You can select the right endpoint by searching by URL of the service. Then get the “name” attribute of particular tag and search for the Binding tag of same name.

Now paste them in the web.config file of the CRM. Under <system.serviceModel> tag you will see two sections called “client” and “bindings” Endpoint should go under client section. Binding tag should go under bindings section, within the tag either <basicHttpBinding> or <wsHttpBinding>, depending on binding type. Identifying the binding type is not hard since name attribute of binding tag contains the type.

You will find something like this in the web.config of the CRM, if you do it correctly.

<system.serviceModel>
<bindings>
  <basicHttpBinding>
    <binding name="BasicHttpBinding_IRateService" closeTimeout="00:01:00"
                        openTimeout="00:01:00" receiveTimeout="00:10:00" sendTimeout="00:01:00"
                        allowCookies="false" bypassProxyOnLocal="false" hostNameComparisonMode="StrongWildcard"
                        maxBufferSize="65536" maxBufferPoolSize="524288" maxReceivedMessageSize="65536"
                        messageEncoding="Text" textEncoding="utf-8" transferMode="Buffered"
                        useDefaultWebProxy="true">
      <readerQuotas maxDepth="32" maxStringContentLength="8192" maxArrayLength="16384"
          maxBytesPerRead="4096" maxNameTableCharCount="16384" />
      <security mode="Transport">
        <transport clientCredentialType="Windows" proxyCredentialType="None"
            realm="" />
        <message clientCredentialType="UserName" algorithmSuite="Default" />
      </security>
    </binding>
  </basicHttpBinding>
</bindings>
<client>
  <endpoint address="https://xxxxxxxxxxxxxxxxxx/webservices/xxxxxxxxxxxxxxx/Rate.svc"
            binding="basicHttpBinding" bindingConfiguration="BasicHttpBinding_IRateService"
            contract="BusinessServiceClient.IRateService" name="BasicHttpBinding_IRateService" />
</client>
</system.serviceModel>  

Click this to read the previous articles explained how to call a WCF from a client side. Please note some services will work fine for plug-ins but not client side due to security reasons. Only solution for that is to create your own WCF service to consume the third party service and then use your service to read values to CRM forms.